Websites have become an integral part of every business. Whether you own an online eCommerce business having a website where you sell different products, such as clothes, for example, or the website serves just as a presentation for your business, SEO it’s a must.
Good Search Engine Optimization or SEO makes sure your website will be on top of the search results when a potential customer searches for something you sell or promote.
It’s redundant having a top notch website if nobody visits it, isn’t it? For you to make sure customers will visit it, you need unbeatable SEO. One of the things you could use in order to improve your SEO is Javascript to make sure all the elements on your website have needed attributes.
1. What’s JavaScript after all?
We’ve mentioned JavaScript, but what is it all about? Well, every modern website consists of three elements which intertwine in order to create it. Those would be: HTML, CSS, and JavaScript.
This sentence best describes their role in a website. “If a website would be a sentence, HTML would be the noun, CSS would be the adjective, and JavaScript would be the verb.”
Basically, HTML elements generate the skeleton of the website, with its title area, headers, paragraphs, and so on. Then, CSS comes in and it adds the needed size, positioning, and colors for the skeleton.
After all this is done, JavaScript will add dynamicity to the website. It will hide the cookie popup once you click it, it will get the needed information from the server, it will send your message when you fill in the contact form, and so on.
This dynamicity can help you improve your website’s SEO by creating various utility functions (also called methods) which will make your life easier and, in the long run, will improve your website’s visibility.
2. Adding Alt Tags
As we already said, JavaScript, due to its dynamicity, can help you boost your website’s SEO.
One of the things you could do is to create a script that will automatically add an Alt tag to the images on your website.
Here’s a small example of a script you could use to do this.
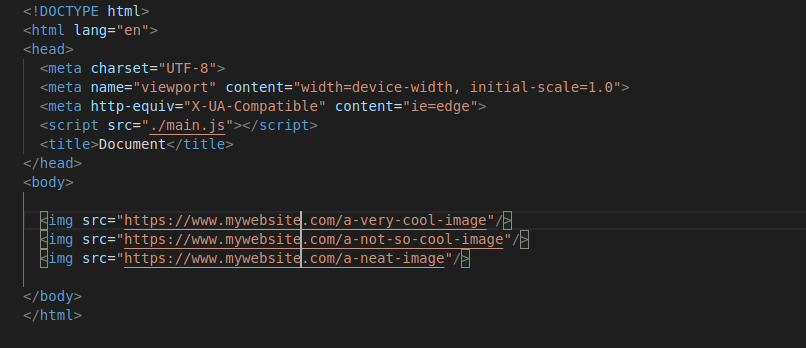
The HTML page looks like this.
And here’s our script.
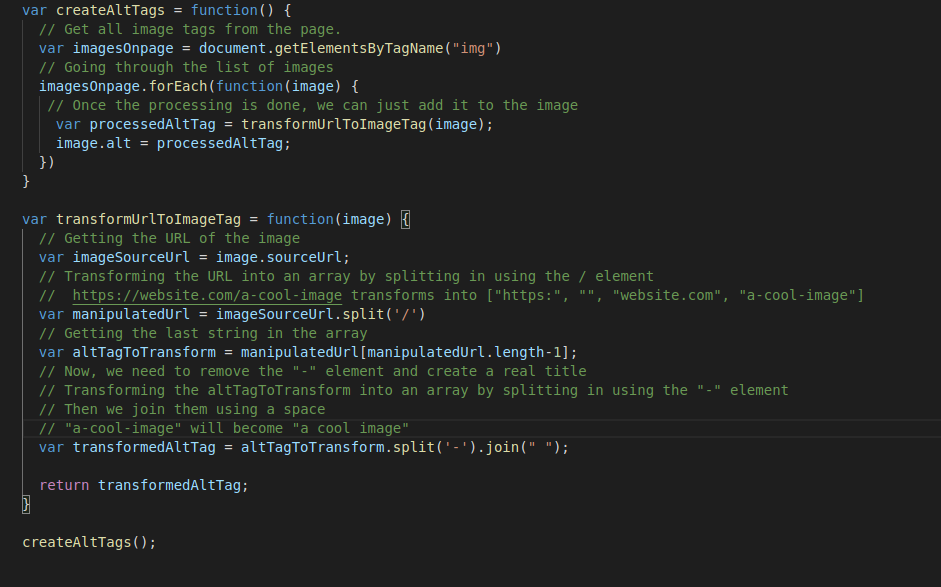
As you can see, first we get all the image elements from our page. Then, we go through each one of them in order to gain access to their sourceUrl, the property which holds the image url. Then, we identify the part of the url which holds the image’s pseudo-title and we process it. We need to manipulate the url in such a way that we transform “a-readable-string” into “a readable string”.
That’s because nobody searches “I-want-food” in Google, they search “I want food”.
Now that we’ve added Alt tags to all the images on your website, let’s add a title for them too.
3. Adding The Title Tags
Now that we added alt tags to our images and if they don’t load correctly the customer will, at least, see a descriptive text, it’s time to add title tags to your images. We will use the same approach as we did for the alt tags.
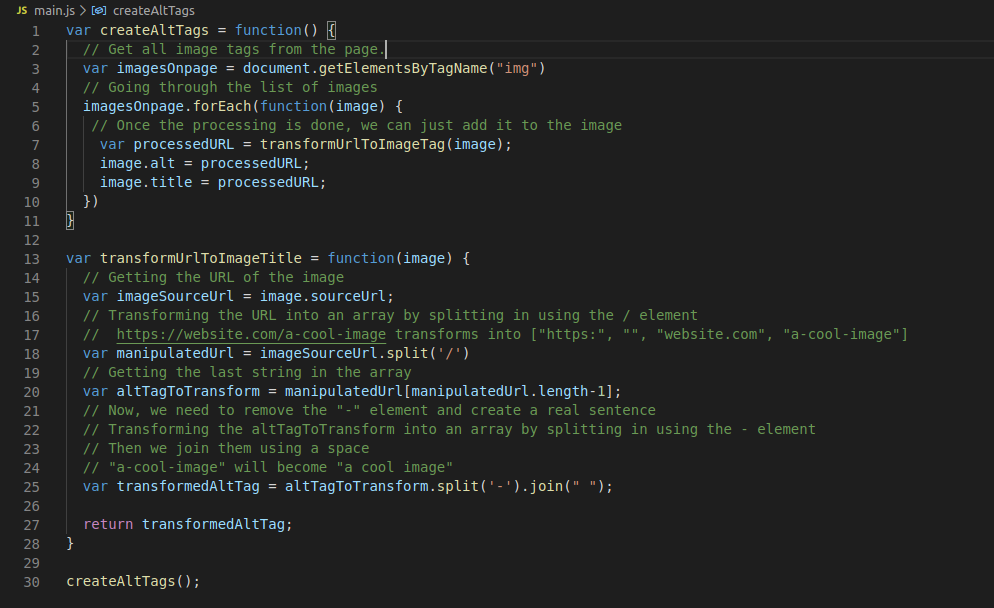
You might say that it’s the exact same script. Yes, 99% of the script is the same, but take a closer look at line 9.
In terms of URL processing, the process is exactly the same, the only difference would be the fact that, in line 9, we add the processed URL to the title of the image, rather than adding it to the alt tag. Easy game, right?
4. Add Meta Description to Each Page
You might be wondering what a meta tag is. Well, a meta tag is used to add metadata to your website and its pages. That data is not rendered, it is rather used by the browsers and the search engines’ crawlers.
Here’s how a meta description is printed in a search engine result.

Now you understand why this meta description is so important?
Let’s take a look at a script that would help you do that.
Here’s the HTML page.
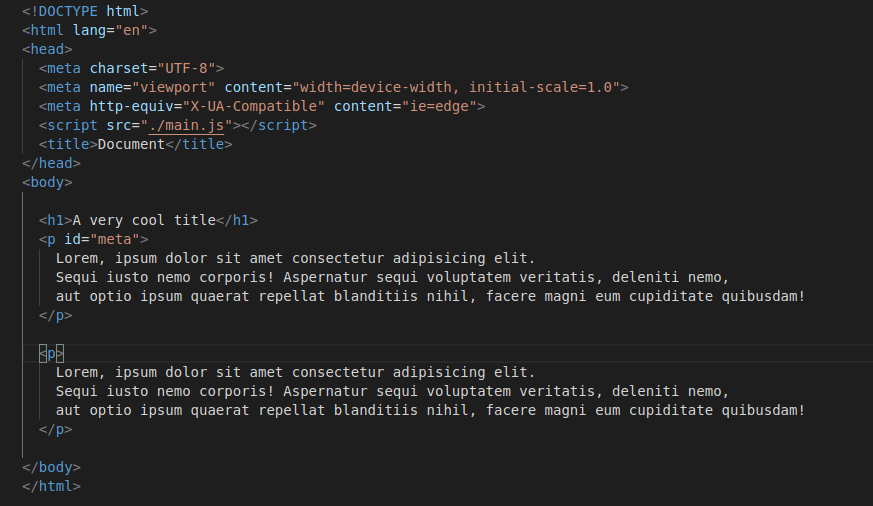
As you can see, we added a paragraph with an id “meta”. That’s the text that we will add to our meta description. Now, here’s the script that will do this magic.
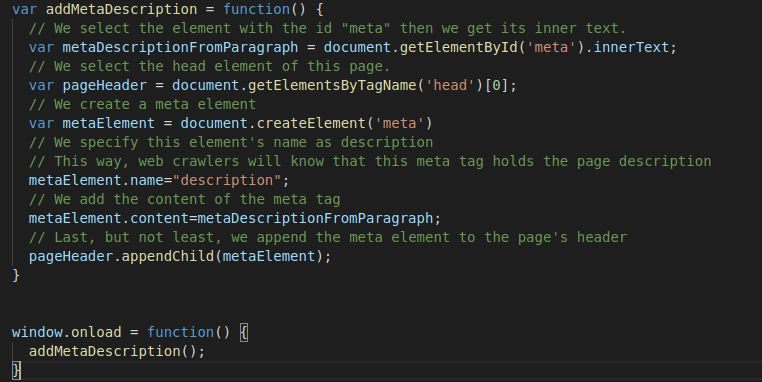
As you can see, you don’t need any professional writing services to do this description, you can do it automatically using JavaScript.
First, we get the element with the id “meta” and we take its inner text. Then, we select the header element in the page because that’s where we’ll place the meta description.
Once that’s done, we create a meta element, we add its name as “description” so the web crawlers will know its purpose, then we add its content.
Last, but not least, we insert this meta description into the header of the page.
5. Calculate Keyword Density
As you already know, it’s very important to use relevant keywords in the articles and posts you have on your website. That’s because they are used to link a search to a certain website or page. If you use “banana” as a keyword, if a potential customer searches for “banana”, your page will appear in the search results.
Even so, you should not use that keyword one hundreds times in a 2.000 word blog post. Search engines will consider you are keyword stuffing or keyword spamming and your page will never appear in the search results.
A good keyword density would be somewhere between 1 and 2 per cent. That’s 1 keyword for each 100 words.
Now, you can use JavaScript to create a script that will calculate the density of a given keyword.
Here’s how you can do it.
Here’s the HTML page:

And here’s the script.
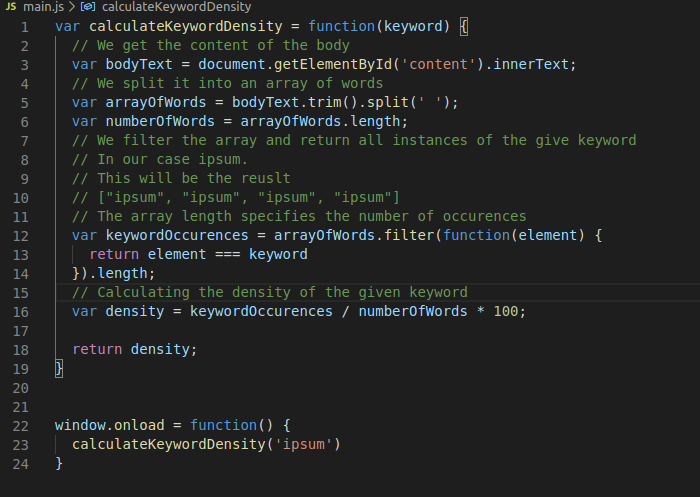
If you decide upon your keywords and using this script you can test the density for them. You input the keyword you want to see the density for and it will return the density as a percentage.
That’s quite witty, right?
6. Specify the Keywords you Targeted
During the last part, we calculated the density for a given keyword. This way, you can test the density of your keywords. But, what happens if you want to programmatically identify the keywords you should specify to the browser, the ones that have the appropriate density?
Let’s try that. We’ll be using the same HTML page as the one in the last two examples.
This is the script.
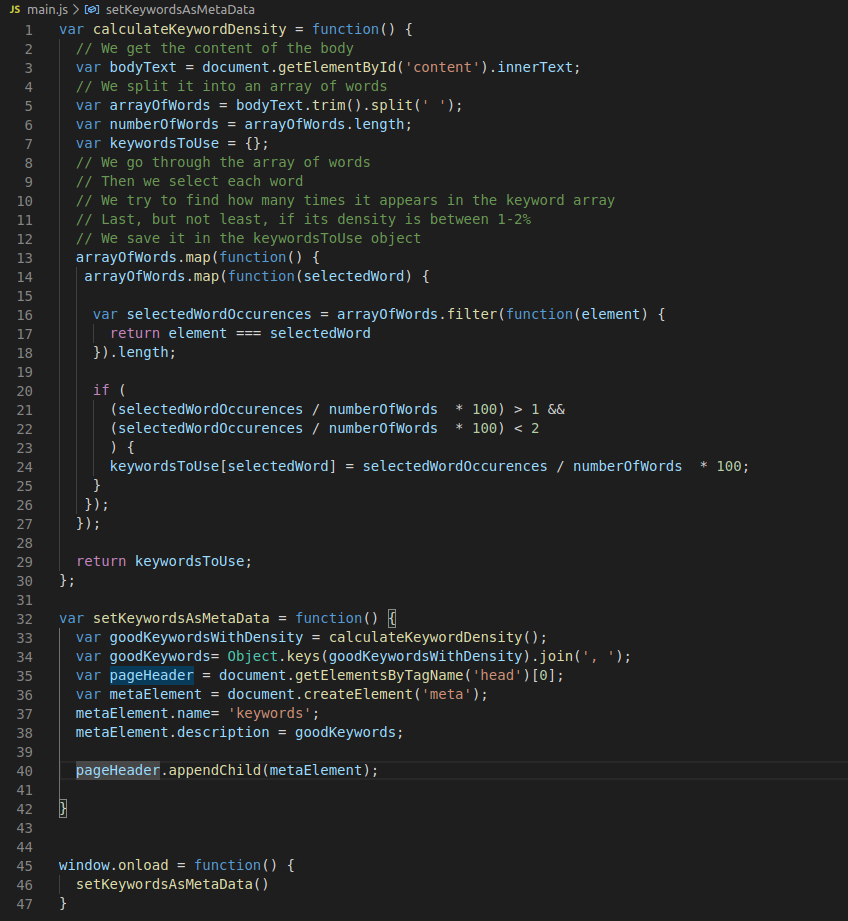
This is a quite complex bit of code, but let’s see what it does.
The calculateKeywordDensity function takes all the keywords present in the page and compares each word with the list of words, then it generates the density for each keyword.
If the keyword density is between 1 and 2 per cent, the keyword will be saved in the keywordsToUse object. Long story short, we save each keyword which fits the keyword percentage rule.
Then, we use this information inside the saveKeywordsAsMetaData function.
This function creates a meta description and sets its name to ‘keywords’, so the web crawlers know that this is the meta tag which specifies the keywords you target in the page.
Then, it takes the word and transforms them from an array into a string. So from [“a”, “b”, “c”], we’ll get ‘a, b, c’. A string which can be added as a content of the meta tag.
In the last part, we append this meta tag into the head tag of the page, because that’s where web crawlers look for information about the page.
Conclusion
JavaScript is a very powerful tool in the hands of a witty SEO professional. By using it, you can automate tasks and you can focus on other parts of the SEO process which you feel more important.
JavaScript can help you add alt tags and title tags to your images. Web crawlers can’t see pictures and movies, you need to add tags to those elements in order to let them know what that certain video or image contains.
Then, you can use JavaScript to add a meta description to each page. This way, customers will get more information about your website while going through the search results.
Last, but not least, you can use JavaScript to calculate the density of your keywords in a certain article or page. Even more, in our last example we created a script where we detect the keywords that meet the density requirements, then we create a meta tag for keywords and we place them inside that meta tag. This way, web crawlers will know the keywords you are targeting.