If you are a Filmorian, I mean filmora user, then you know how easy this software is to use. But, if you are not, then this article is absolutely for you to make you comfortable with this software.
Importing videos
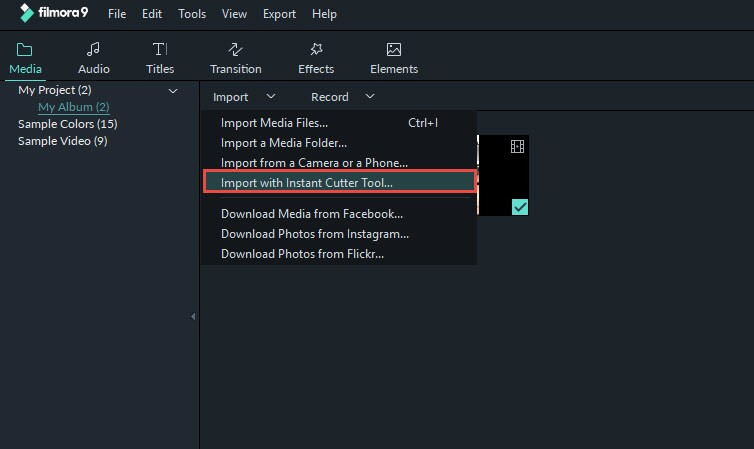
Here’s how to import videos, music, and photos from your smartphone, camcorder, or computer to Filmora.
Connect your camera, camcorder, or phone to your computer. Once the connection is complete, click on Filmora’s Media button.
Click on the arrow icon at the top of “Import” to choose “Import from phone or camera” from the drop-down menu.
In the pop-up window, select your phone, camcorder, or camera to import from.
Once it has finished scanning, you will be able to choose the files that you want to import to Filmora.
You can also import audio/videos/images from your computer to edit. You can import them by going to the Media section and selecting Import.
You will see a pop-up that allows you to choose audio, photos, and videos from your computer.
Background removal
The Overlays Green Screen effect is a new feature. This makes the color range between two overlay clips transparent. The background-clip or image behind this top layer may show through.
Filmora makes it easy to achieve this effect by adding green screen clips or creating a green background for your video footage.
Wondershare has improved the functionality in the latest version. Simply import your videos to the timeline of Filmora.
Drag and drop your videos onto the edit panel. After that, make sure you have the green screen footage on the top layer and the other footage at the bottom layer.
This is because the green screen footage will appear in your video if you place it on top. You can also use it to apply different effects in your videos.
After inserting videos successfully, right-click on the green screen footage and click on Green Screen from the drop-down menu. To open the file, press Ctrl+ Alt + G.
Right-click on the green screen to select Green Screen. Right-click on the green screen and select Green Screen.
Under Chroma Key, you’ll see options such as Offset, Tolerance Edge Thickness, Edge Feather, and Edge Thickness. Let’s look at these options and see what they do.
Offset:
This is how you control the shadows and blacks in an image. This alters an image’s brightness and color levels while leaving unaffected mid-tones, highlights, and other areas.
Tolerance:
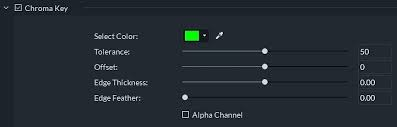
The color tolerance limits the amount of color that can be seen in a sample and a standard to make it acceptable.
Tolerance values must be compatible with the human eye to ensure that color is acceptable both numerically and visually.
Edge Thickness:
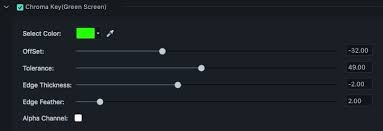
Edge Thickness is the thickness of your Edge and how it will be displayed. This is the most common use of it.
Feather:

Edge Feather adjusts a simple Radial or Linear gradient to fit your frame or shape. These options allow you to adjust the intensity and make the green color transparent. After you are satisfied, click Ok to save your video. Filmora allows you to adjust your settings and then click the Ok button. That’s it!
Cut/Trim/Split Videos
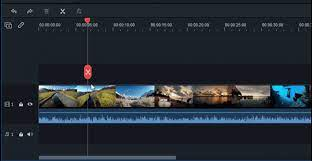
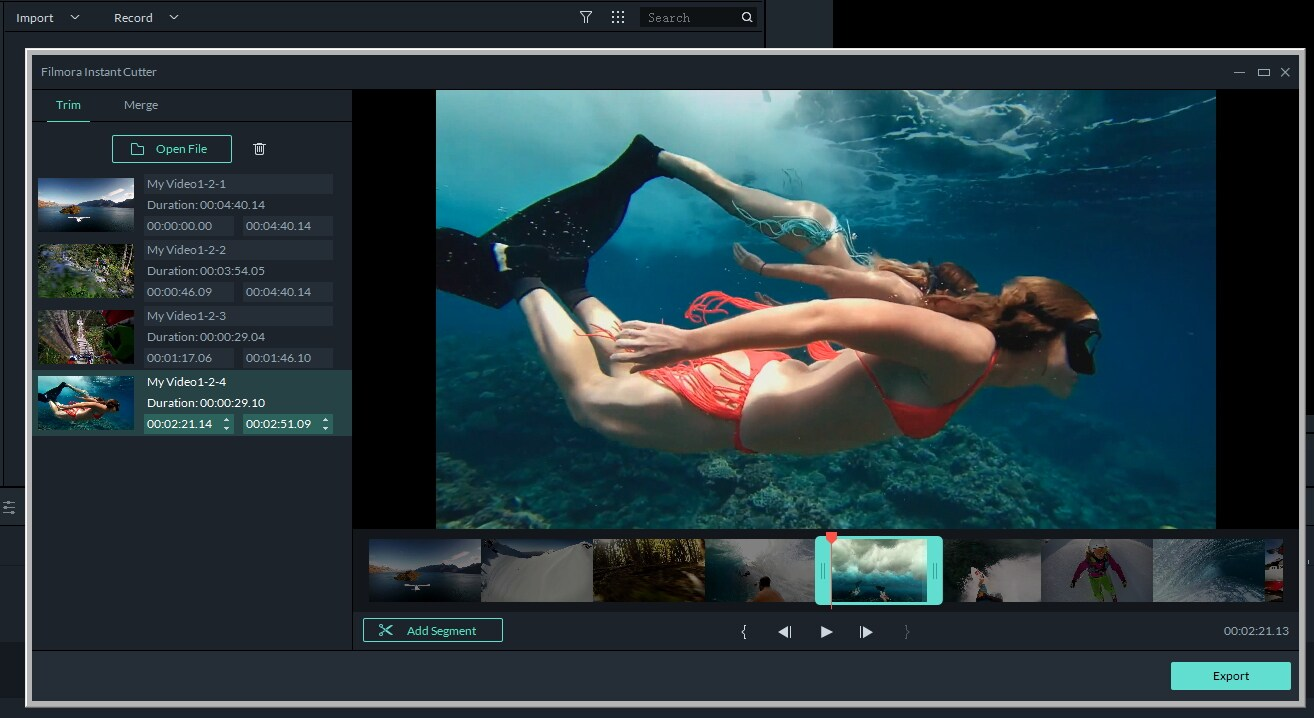
You can cut and edit any video, even 4k resolution, on Filmora.
To trim the end or begin portion video can be used, trim can be easily cut. Zoom in on your timeline to locate the frames you wish to remove.
Drag and drop the trim icon right to delete the start of the timeline. To trim unneeded ends, drag the trim symbol left at the end to delete the beginning.
You can trim clips at either the beginning or end of a video. You can also break up a video and delete unwanted parts, then merge them together into one.
Click the button below to move the player into the first position of the video section that you want to trim split icon(Scissor icon in the toolbar or Split button at played to split your clip. Find the starting frame.
Move your Playhead to the End Frame and click on Split. Continue to the end. Continue the process.
Slice a video into multiple. You can choose to delete or re-order cut parts and make further edits.
Click here to delete unwelcome cuts videos. Then Delete icon on the toolbar.
Editing text
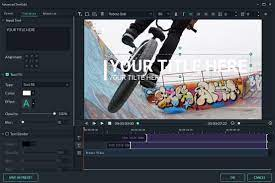
Drag and drop video clips from your media library to the timeline panel. You can trim, delete, or add Text to the video depending on your needs. Zoom in on the edit panel to see the frame closer and locate frames that need a text overlay. Filmora to add Text on video.
Select Text Presets, and then click the Titles tab.
Filmora has more than 200+ text effects. These include styles like Lifestyle, Media, Seasonal, Opener, Lower 3rd, and End Credits.
Double-click the titles preset to view the preview window. Filmora to add Text to a video. If the Playhead is on the right place for you, drag the Playhead to the track below the video in the timeline.
Change the duration of the Text. The default text overlay’s duration is 5 seconds. However, you can adjust the length of your video by dragging the text module’s Edge in the timeline.
You can also select the Text from the timeline and click the Timer icon. This will change the duration of any text effect.
Adding Transitions
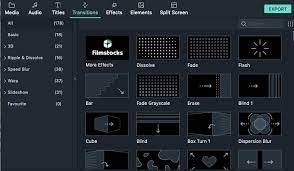
You can add transitions between images or videos in your project by going to Transitions. Drag the transition into the timeline between your clips.
You can only use transitions in Filmora 8 versions. Filmora 8 and higher allows you to apply transitions on any video track.
Drag and drop a video clip or an image to apply a transition. Click on Transitions. Drag a transition to the end or beginning of a video clip, or image, in the timeline.
The transition can be placed between two videos double-click on the transition in the timeline to change its duration.
You can click and then drag the beginning or endpoint of the transformation forward or backward in the video clip or image.
The default duration of the transition is two seconds prefix Transition latest Filmora.
Postfix Transition postfix transformation latest Filmora. You can create a transition between two clips or images.
Drag and drop the image or video clip into the timeline. Select Transitions and drag the transition between two clips.
Double-click on the transition in the edit panel to change its duration. You can click and drag the transition’s start or endpoint forwards or backward in the video clip or image. The default duration of the transition is two seconds transition in the middle in Filmora.
Note: If a piece is too short to allow for a transition to take place, trimmed frames will be used. Double-click the transition and select the option to not include trimmed frames.
The transition included in Filmora trimmed frames. To create the same transition for your entire project, right-click on the transition that you wish to use and choose to APPLY ALL.
The transition will be applied between clips that are adjacent to each other. Select the transition you wish to delete from your project and hit the Delete key on your keyboard.
You can also right-click the transition and choose DELETE from this menu. To save a transition to your favorites, right-click on it in the Transitions menu. Then choose to Add to Favorites.
Exporting File

To see the result, click the “Play” button. Click on the “Export” button to choose an output format.
In the advanced settings, you can modify audio and video parameters like Bit Rate, Encoder, Resolution. Filmora also allows you to upload directly to YouTube.
You can also burn it to DVD to watch on your home TV.
You can play on your mobile device by selecting the “Devices tab” and choosing a device like an iPhone, iPad, iPod, or Zune.